Wednesday, January 19, 2011

Penne with Shrimp and Herbed Cream Sauce, Take 2

Instead of cooking the shrimp before I cooked the sauce, I cooked the shrimp in the sauce, and it made an amazing difference.  


Penne with Shrimp and Herbed Cream Sauce

Ingredients (Serves 2)
2 oz penne pasta
1 tablespoon olive oil
1/2 lb medium shrimp, peeled and deveined
1 clove garlic, minced
1/6 teaspoon kosher salt
pinch pepper
9 oz whole tomatoes (from a 14oz can), drained and roughly chopped
1/6 cup basil, chopped
1/6 cup parsley, chopped
pinch red pepper flake
1/3 cup white wine
1/6 cup clam juice
1/4 cup heavy cream
1/6 cup parmesan cheese, grated

Bring a pot of salted water to boil, and cook pasta according to directions; drain pasta, and set aside.
In a large skillet, heat oil over medium high heat; add garlic and cook until browned, about 1 minute.
Add tomatoes, 1/2 of the basil, 1/2 of the parsley, and the red pepper flakes to the skillet and cook for 2 minutes, stirring constantly.
Add the wine and simmer for 2 minutes.
Add the clam juice and cream, bring mixture to a boil; reduce the heat to low and simmer for 7 minutes until the sauce thickens.
Add 1/2 of the parmesan cheese, the shrimp, the pasta, and the remaining basil and parsley.  
Stir and cook until shrimp are pink.
Top with remaining cheese and serve.

Oatmeal Cookies (Kind of Fail)

I normally get the urge to make cookies whenever I spend an abnormal amount of time with Elizabeth, and this time was no different.  My recipe was from Alton Brown's oatmeal episode, which featured a cookie that was more oatmeal than anything else.

The first thing that his recipe asked for was to toast the oats in the oven.  Unfortunately, I over-toasted the oats simply by following the instructions.  I figure if I had checked more often, they would have been alright.  (Can't blame AB too much on this, ovens vary from place to place, so it's more my fault for not paying attention closer.)  After the oats were toasted, half of them were placed in a food processor to create an oat flour.  

In the mixer, sugar was creamed, and an egg and vanilla extract was added. Cinnamon, baking powder, and salt was added to the oat flour, and the oat flour was added to the mixer.  After that, I spooned it out onto a pan, and baked for 12 minutes.  


The cookies tasted...interesting.  Unfortunately, because of the over-toasted oats, the cookies had a slightly burnt taste to them.  Besides for the off taste, the best word I can put to describe them was "organic".  The use of oats instead of flour (therefore making it gluten-free) gave it an interesting nutty flavor.  After a few samplings of the cookies, I began to enjoy them, but because I'm not completely sold on the flavor of the cookies I'm not planning on posting the recipe.  If you want to find it, however, it's on foodnetwork.com.

Monday, January 17, 2011

Fusilli alla Caprese, Take 2.

So I bought a different type of mozzarella cheese for this recipe, one seasoned with herbs and marinated in olive oil.  When I tasted it, the cheese had no flavor but olive oil.  I was frustrated, but willing to try it in the dish.

As it turns out, that particular version of the mozzarella blossomed after being heated, so it will forever be a part of this recipe as long as I can find it.


Fusilli alla Caprese

Ingredients (2 Servings)
3 oz fusilli pasta
1 1/2 tablespoons olive oil
1 clove garlic, minced
7 oz cherry tomatoes, quartered
1/2 teaspoon salt
1/4 teaspoon pepper
1/4 cup basil leaves, torn
4 oz fresh mozzarella marinated in olive oil, diced

Boil a pot of salted water, add the pasta, and cook according to box directions.
Heat the olive oil in a skillet over medium heat.
Add the garlic and saute for 2 minutes.
Add the tomatoes, salt and pepper.
Smash the tomatoes with a fork as they cook to make a chunky sauce, and cook for 4 minutes.
Add the tomato sauce to the bowl with the pasta, and toss to combine.
Stir in the basil and mozzarella, and serve.

Tuesday, January 11, 2011

Lemon Risotto

A risotto is a dish, often served as an appetizer in Italy, that consists of rice slowly cooked in a broth.  The end result should be creamy, and not mushy.  I had made a risotto last year that involved shrimp and scallops, and it had tasted pretty good.

This risotto involved heating chicken broth and lemon juice so it would be ready to be poured into the rice. In a saute pan, shallots were cooked in butter, and rice was added to toast slightly.  Wine and lemon juice are added to the mix to be absorbed by the rice, and then the broth was added until the rice was done.

One of the things I had trouble figuring out was when the rice was actually cooked correctly.  I had run out of liquid and had started to create more when I decided the rice was a good level of al dente.  Part of my concern was also that the instructions said to cook for 20 minutes, and my liquid had only lasted 10.

After I had decided the rice was cooked, I added more butter, parmesan cheese, mascarpone, and lemon juice to complete the dish.


The final product had a very rich flavor, but I found that I couldn't eat the proportion on my plate.  This would definitely fare well as a side dish, and I wonder how well it would pair with the lemon pesto chicken I made last summer.  I'm going to try it with a smaller proportion next time paired with the chicken.

Savory Beef with Pickled Vegetables (New Picture!)

I made this dish recently and was able to take a new picture.


One of the things that I am working on besides my cooking skills is my food photography skills.  I know there's a whole profession for staging food and taking pictures of it, but a lot of that is based on illusion.  I think that it's more fun (and more of a challenge) to do it with real food, and to be able to enjoy it afterwards.

Creamy Dill Cucumber Salad

In the Cooking for Two book that I own, a long time ago I had grabbed a recipe for using up the other half of the cucumber from here.  From what I can tell, it's fairly classic in it's use of dill and sour cream, but it was very tasty, and super easy to make.

To create the salad, I tossed the cucumber and a chopped shallot with some salt and let it sit for an hour in a colander.  The sauce consists of sour cream, dill, apple cider vinegar, and sugar mixed together.  When the cucumber is done draining, mix them with the sauce, and serve.

One of the things I wasn't expecting was how little this recipe actually makes.  It was alright for two side servings (which is appropriate, considering the name of the book it came from), but thankfully it can be easily doubled.


Creamy Dill Cucumber Salad

Ingredients (Serves 4)
1 cucumber, halved, seeded and sliced thin
2 shallots, sliced thin
1/2 teaspoon salt
6 tablespoons sour cream
2 tablespoons dill, minced
2 teaspoons apple cider vinegar
1/4 teaspoon sugar
pinch salt
pinch pepper

Toss the cucumber and shallots with 1/8 teaspoon salt in a colander and let drain for 15 minutes to 1 hour.
Mix the sour cream, dill vinegar and sugar together in a small bowl.
Stir in the drained cucumbers and shallots season with salt and pepper to taste, and refrigerate until chilled before serving.

Monday, January 10, 2011

Fusilli alla Caprese

This recipe from New Italian Favorites was the second Caprese dish I've made in my history of cooking, but the only one that I've blogged (as of this exact moment).  Caprese dishes are fairly consistant in containing pasta, tomatoes, basil, and fresh mozzarella, and often times served warm instead of hot.

As with a lot of the dishes I make, I sample the raw ingredients (not the meat) before I cook them to be able to note the difference after heat is applied.  The last time I had gotten fresh mozzarella, it was the BelGioioso brand, and I found it to be flavorful, if not a little rubbery.  In hoping to ditch the rubbery texture, I tried a different brand, called Mozzarella Fresca.  While this brand had less of a rubbery texture, it had absolutely no flavor.  I'm not sure how lucky I will get in finding a flavorful cheese as mozzarella is a relatively bland cheese.

One of the things Jeff was bothering me about while looking at the fresh cheese in the produce area was if it was just easier to buy the shredded stuff.  I explained to him that the recipe asked specifically for the fresh stuff, and that the shredded cheese that covers pizzas is different.  I did research on this later on, and found out that the shredded version is a lot drier, which means the end result would be significantly different.

In this recipe, a unique aspect was that the tomatoes were quartered, heated over a saute pan, and mashed to create a sauce.  Then, the basil, mozzarella and pasta were added to create the final dish.


The finished product was delicious; I'm going to attempt to find a better tasting mozzarella, then I'll post the recipe.

Tuesday, January 4, 2011

"Mushroom soy chicken of amazingness"

A while back, I did a recipe from KNACK Quick and Easy Cooking that involved chicken on kabobs, called Asian Chicken Kabobs.  The only thing Asian about it is that the recipe involves ginger and soy sauce, so I'm looking to ditch the title.  The title above in quotes is the working title for now, suggested by Elizabeth.  I'm surprised she didn't suggest something like "Rufus" or "Carly".  My only concern about the working title is that it could imply that the chicken is made of soy, which it certainly wasn't.

The recipe for the kabobs was very simple; marinate chicken and mushrooms in a mixture, then grill.  Because grilling isn't something I can do all year long (well, I could, but I really don't like the idea of standing outside in 10 degree weather), I wanted something that I could enjoy inside with the same great flavors.

I started out by marinating the cut up chicken and mushrooms, just the same as with the kabobs.  The marinade consists of soy sauce, brown sugar, olive oil, garlic, ginger, and green onions.  After the 2 hours had passed, I heated up the saute pan, and poured the chicken, mushrooms, and marinade onto it.  After cooking it for about ten minutes, it was ready to be served.


The dish tasted delicious.  There were things that it was lacking, such as rice, and frankly, colors besides brown.  I think that the addition of carrots and tomatoes (not during the marinade) might offer a little more color and taste.  Thankfully, there isn't much taste-wise that I need to work on with this recipe, so it should be very easy.  

Sunday, January 2, 2011

Penne with Vegetable Bolognese

I was able to retry the "Rigatoni with Vegetable Bolognese" recipe with similar success as last time.  The only changes I made was in the preparation.  I chopped everything by hand, rather than using the food processor, and I also switched out the color of bell pepper to yellow instead of red.  And, everything tasted wonderful.  So, without further pause...


Penne with Vegetable Bolognese

Ingredients (2 Servings)
1/3 ounce dried porcini mushrooms
1/2 cup very hot water
1 carrot, peeled and chopped
1/2 cup onion, chopped
1/2 cup yellow bell pepper, cored, seeded, and chopped
1 clove garlic
1 teaspoon fresh thyme, chopped
1 teaspoon fresh oregano, chopped
3/4 teaspoon salt
1/3 teaspoon pepper
2 oz mini bella mushrooms, sliced
3/4 tablespoon tomato paste
1/4 cup red wine
1/4 cup mascarpone cheese
2 oz penne rigate
1/4 cup Parmesan cheese

Place the dried porcini mushrooms in a small bowl and cover with hot water.
Set aside and let the mushrooms soften.
Bring a pot of salted water to boil, in preparation for pasta.
In a bowl, combine the carrot, onion, bell pepper, garlic, thyme, oregano, salt and pepper.
Heat 1 teaspoon olive oil in a large skillet.
Add the chopped vegetables and cook over medium until tender, about 6 minutes.
Strain the porcini mushrooms, reserving the liquid.
Add the porcini mushrooms, fresh mushrooms, and tomato paste; continue cooking until the mushrooms are softened, about 5 minutes.
Add the mushrooms soaking liquid and the red wine.
Bring the liquid to a boil, reduce the heat to low, and let simmer until liquid is reduced by half, about 10 minutes.
While the vegetables are cooking, cook the pasta.
Add the mascarpone cheese to the skillet, and stir.
Drain pasta, reserving 1/2 cup of the pasta water.
Add pasta to the mixture, adding the pasta water if necessary.
Toss with the Parmesan.

Michael the Microwavable Meatloaf

First, I have to explain the title.  Since this is the final rendition of the recipe, I wanted to give it a name rather than "Meatloaf".  So, I posed the question to Elizabeth, "What should I name the meatloaf?"  She replied in all seriousness, "Francesca?" "No, I mean something like 'Awesome Meatloaf'."  "How about Michael the Microwavable Meatloaf?" "Done."

I was able to make use of Jeff's sister's christmas gift, which was a pasta maker attachment for the KitchenAid stand mixer.  The attachment doubles as a meat grinder, and after reading reviews of the product online, I think that will be it's only use in my kitchen.  (The reviews for it's intended use were mostly negative, something involving the pasta sticking to itself too much and poor design.  The reviews regarding the meat grinder function were all shining, however.)

For the meat, I chose a USDA choice beef chuck eye steak.  It was recommended to me by my butcher because of how much fat was in it.  Jeff thought it looked nasty, but that's because he can't stand the idea of fat in meat.  (Not a bad thing as far as being healthy goes, but without fat some things about cooking just aren't possible.)  I put the beef into the freezer for about ten minutes for it to harden up before I cut it into long strips (they varied from 1/2 inch to 1 inch), then put those strips back into the freezer for 20 minutes to harden more.  I set up the attachment with the larger of the two meat grinding inserts, and noted that the instructions recommended two passes through the grinder for a better distribution of the fat.  Unfortunately, it didn't mention whether we should pass it through the smaller insert or the larger insert the second time.

When the meat was nice and hard, I put the stand mixer on setting 4 (as per the instructions) and fed it the strips of meat.  After a few moments of anticipation...holy crap, it's ground beef!  It was pretty quick, too.  I was able to put the meat through in about 5 minutes.  I decided not to give it a second pass, because of the final product; I figure if I were making something smaller, such as a hamburger, I would give it a second pass.  I only needed a pound of the beef, so I packaged the leftover pound and a half into different bags for later use.

There was a small amount left over from that, which Elizabeth suggested, "Why don't we cook it right now?"  "Ok!"  "Wow, every time I say something like that to my mom, she thinks I'm nuts."  "So, this means that I'm cooler than your mom!"  I figured it would be a good way to gage what the meat actually tasted like, in comparison to any other ground beef the both of us had previously tasted.  She sautéed the beef in a small pan, and let it cook in it's own fat.  The meat had a very rich flavor.

 I combined the ingredients with the freshly ground beef, and folded it in my microwave safe bowl.  I cooked it using the same instructions as my previous microwave meatloaf dish, in hopes that it would cook the same.

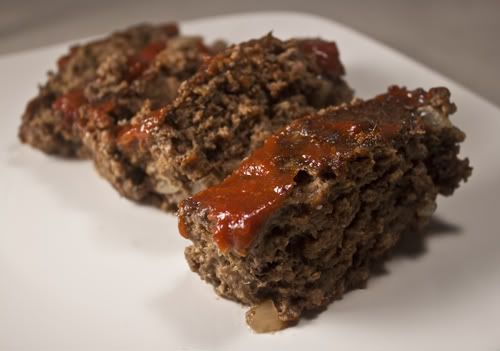
It turned out amazing; just as flavorful and tender as when it was baked for an hour and a half.


Michael the Microwaveable Meatloaf

Ingredients (Serves 2 or 3)
1 egg
1/3 teaspoon worcestershire sauce
1/2 cup milk
1/3 cup dry breadcrumbs
1/4 cup onion, finely chopped
1 1/3 teaspoons parsley
2/3 teaspoon salt
1/8 teaspoon pepper
1/3 teaspoon ground sage
2/3 teaspoon chili powder
1 1/3 teaspoons garlic powder
1 lb ground beef
1/4 cup ketchup
1 1/2 teaspoons brown sugar
2/3 teaspoon dry mustard

In a microwave safe bowl, combine eggs, milk, and worcestershire sauce.
Stir in crumbs, onion, parsley, salt, pepper, sage, chili powder, and garlic powder.
Add beef, and mix using a spatula.
In the microwave, cover and cook for 10 minutes on high.
Mix ketchup, brown sugar, and mustard.  Spread over the meat and return to the microwave for 5 minutes, uncovered.
Let rest in the microwave for 10 minutes before serving.

Saturday, January 1, 2011

Kielbasa and Shrimp Creole, take 2.

One of the more useful gifts that I was gifted with this holiday season was a set of glass prep bowls (Food Network Brand, which I wasn't aware there was one), from the writer of http://pickyfamily.blogspot.com/.  I wanted to take advantage of using them, even though all the ingredients for this recipe could be prepped in just one bowl.  Nobody will know.


I made a significant number of changes from the previous version of this dish.  Instead of using the food processor to slice and dice my food, I chopped it by hand so it would be chunky by the end of the cooking process, rather than mushy.  I switched the color of the bell pepper to yellow, because it's my favorite of all of the colors, and the least "peppery" tasting.  And, it's colorful.  To see how much the natural flavors of the dish stood out, I didn't add any seasoning besides for salt and pepper.  The last thing I experimented with was cooking the rice while I was working on the rest of the prep, and sticking it in the oven (at 200 degrees) to keep it warm until I needed it for plating.  


As you can see by the picture, there are actual chunks of food, rather than lots of mushy bits.  

The taste of the dish was a mixed bag.  The vegetables proved themselves well without extra seasoning, but the shrimp were surprisingly bland.  I think that my troubles with this recipe will lay with finding just the right amount of spiciness to make the dish brilliant. 

 Of course, Jeff says that the level of spice that the previous version had was perfectly fine for his tastes.  (This comes from a man who samples dog treats out of curiosity, meaning that he can tollerate tastes that make me want to wash my mouth out with soap.)

As for the rice experiment, the oven proved itself useful in keeping the rice perfectly cooked and perfectly warm.